Adding a new variable
Overview Copied
To add a new Variable within Opsview Cloud, go to the Configuration > Variables menu, and click on the Add New button which will load a modal window allowing the configuration and saving of the new Variable:

You can choose to provide friendly names for the arguments instead of ‘arg1, arg2, arg3’, etc. In the example below, we have created a Variable that will be used to pass authentication details to a Service Check, and have thus changed arg1 to ‘Username’ and arg2 to ‘Password’.
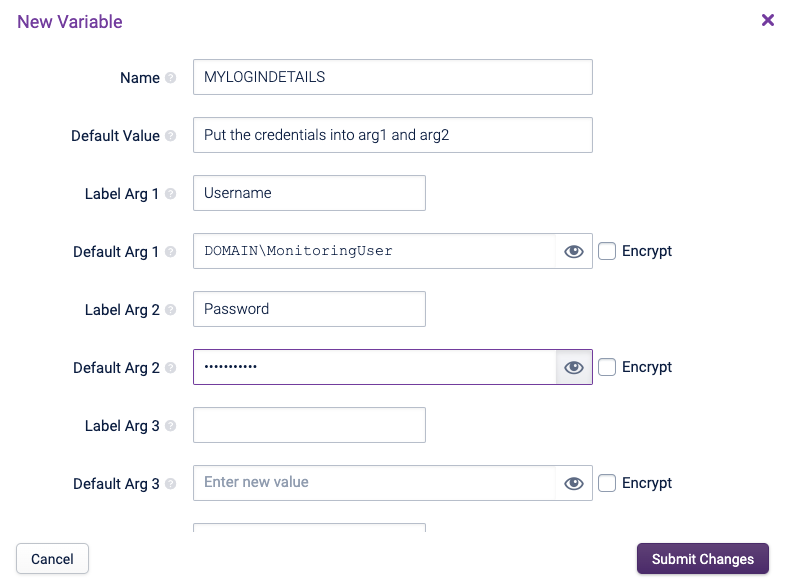
As can be seen in the screen above, the Encrypt button has been checked for ‘Arg2’, meaning any value entered here when the variable is added to a host, will be stored and handled in a secured way in Opsview Cloud.
Click Submit Changes to create the new Variable.
Field Details Copied
Name Copied
This is the name of the variable.
Note
If you rename the variable, any host variables will automatically use the new name. However, any command line definitions (in Service Checks, Host Checks, Notifications, or Event Handlers) will need to be manually updated.
Default Value Copied
This is the default value for this variable. For example, if the variable has the name USERNAME and default value is admin, then %USERNAME% in a command line will be expanded to admin. See Adding the variable to a Service Check.
The default value can be overridden by adding the Variable directly to a Host.
As the value may be used in the Service Check name, there are limitations on how it should be defined. The value should contain 63 characters or less, and only certain characters are allowed. This is because Opsview Cloud may append it to a Service Check name (for Service Checks that have the Create Multiple Service Checks option enabled) along with some standard text.
The total length of the generated service description cannot be longer than 128 characters. If it is longer, this will cause a failure when running Apply Changes from the Configuration menu, and the following message will be displayed:
ERROR 500: Service name 'XXXX' on host 'YYYY' has greater than max 128 chars.
Label Arg X Copied
This is a “nice label” for each of the arguments. This is used to display a hint in the user interface about what data should be used in the associated Arg field.
Default Arg X Copied
This is the default argument for each of the arguments. This can be overridden by a host variable.
Adding the Variable to a Service Check Copied
Note
Variables can only be added to plugin-based Service Checks.
-
Note the name of your Variable and the arguments (where relevant), i.e. arg1 is username, arg2 is password and so forth.
-
Go to Configuration > Service Checks to open the Edit window for the Service Check you want to add the variable to.
-
Once the Service Checks window is loaded, add a new variable or click edit in the Service Checks contextual menu.
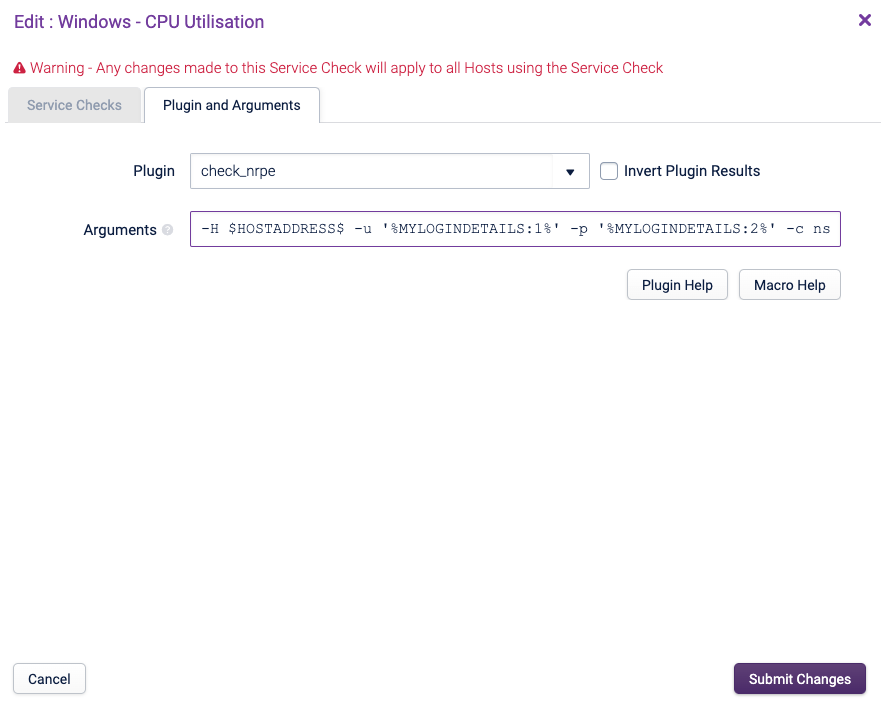
In the example above, we have simply inserted %MYLOGINDETAILS:1% and %MYLOGINDETAILS:2% (representing the arg1 and arg2 fields from our Variable) to an existing check with the standard ‘u/-p flags (username/password).
-
Click Submit changes and the Variable is now ‘added’ to the Service Check.
Adding a Variable to a Host Copied
Adding a Variable to a Host is done via the Variables tab within the Host Settings edit window, as covered in Section Configuring a host: ‘Variables’ tab.
-
Go to Configuration > Hosts and edit the Host you want to add the variable to.
-
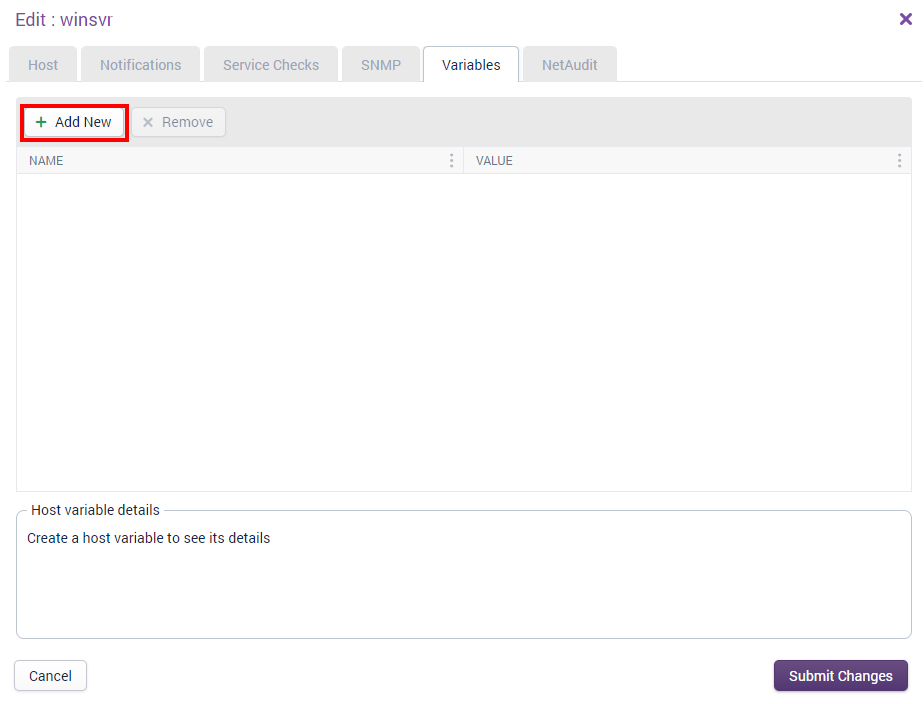
Once the host’s modal window is opened, click on the Variables tab:
-
Click on the Add New button which will add a new line to the table, as shown below:
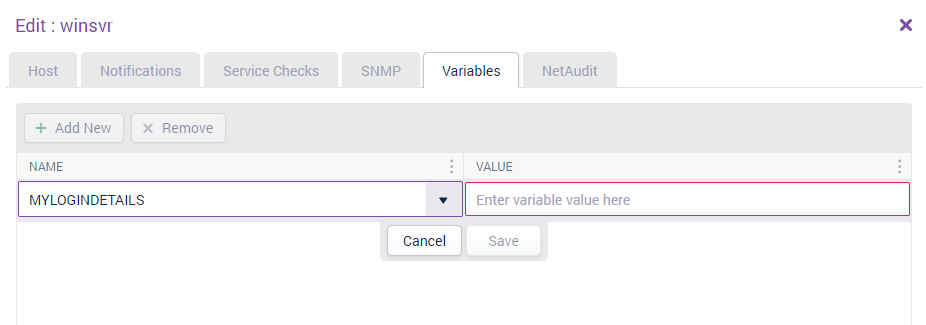
The drop-down on the left allows the User to choose the Variable; here we can select our newly-created MYLOGINDETAILS. (Note the % symbols are not shown here).
-
Once the Variable is selected, enter some text in the value; as the value field is not used for the MYLOGINDETAILS Variable, we have just entered a description in the screen below (as the value cannot be blank). For Variables whose values are used, i.e. DISK, then the value must contain a relevant value i.e. ‘/tmp’ or ‘/home/users’.

-
Once the Variable has been saved, the arguments window in the lower half of the modal window is enabled:
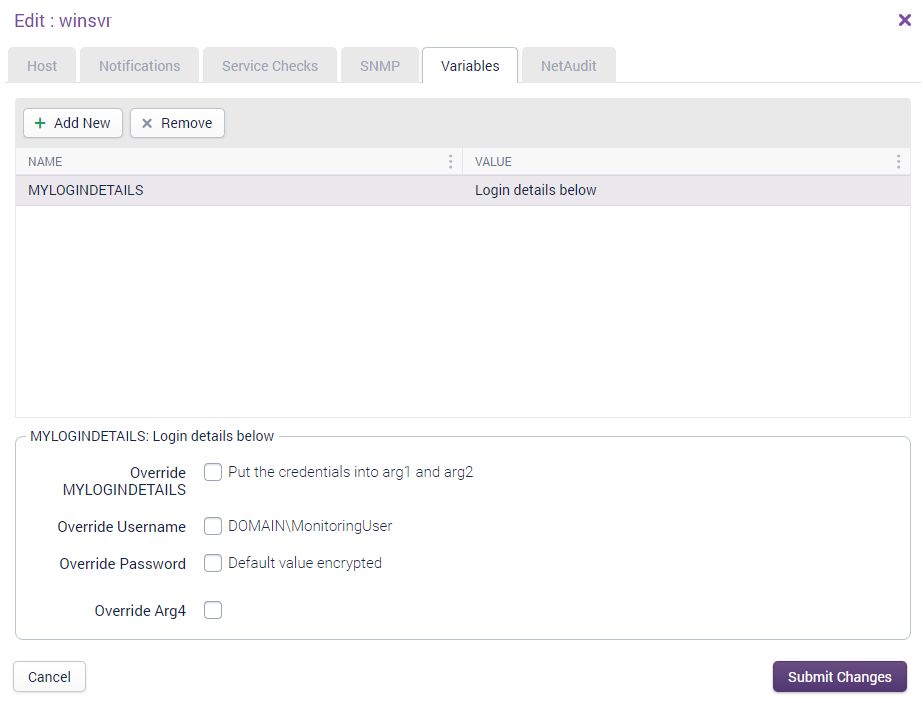
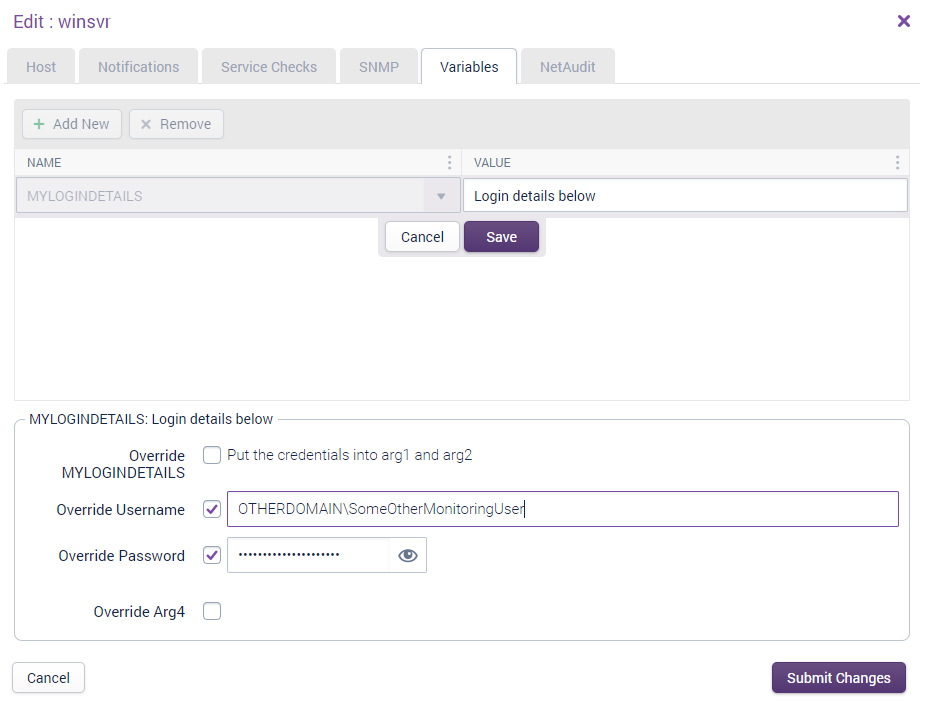
In the example above the Username and Password labels we set earlier for arg1 and arg2 can be seen. We can leave these as the default, or we can choose to override them ’ i.e. add a value custom to this one host:
-
Once the Submit Changes button is pressed, the Variable and its overridden values are saved ’ and the Password field encrypted.