Opsview 6.8.x End of Support
With the release of Opsview 6.11.0 on February 2025, versions 6.8.x have reached their End of Support (EOS) status, according to our Support policy. This means that versions 6.8.x will no longer receive code fixes or security updates.
The documentation for version 6.8.9 and earlier versions will remain accessible for the time being, but it will no longer be updated or receive backports. We strongly recommend upgrading to the latest version of Opsview to ensure continued support and access to the latest features and security enhancements.
Importing a scan output
Sandbox view Copied
When a scan finishes, it will go into a Completed state. The View results allows you to see the results of the scan in a new tab, also known as the sandbox view.
![]()
This view allows you to see what the results of the scan are.
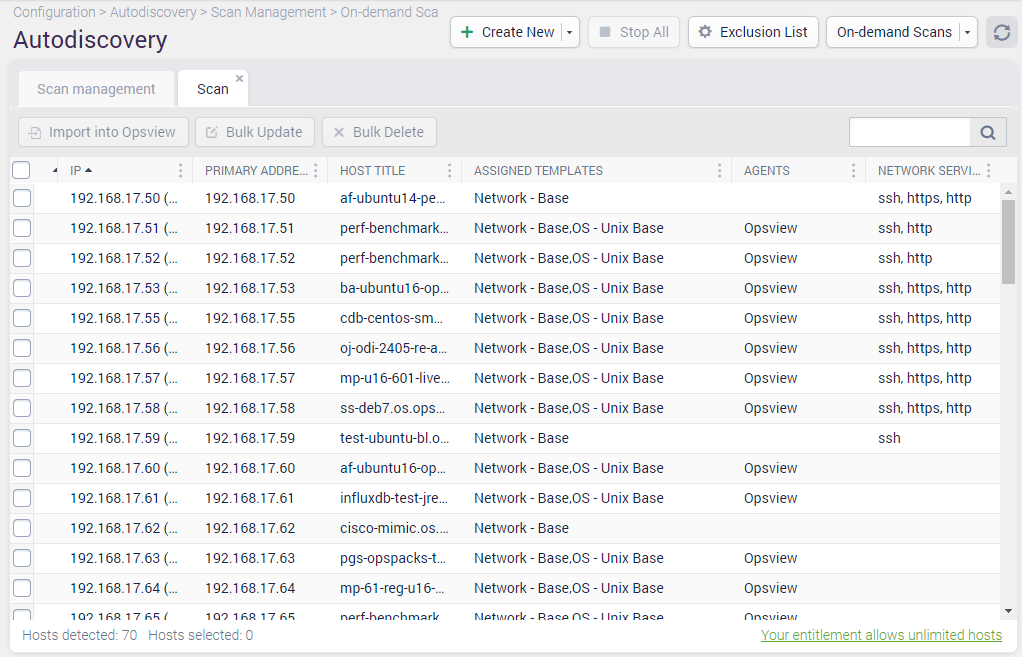
As can be seen above, the Autodiscovery scan ‘Test Scan’ has detected and profiled 21 Hosts on the given network range. For eight of those Hosts, it was able to authenticate via SNMP and has applied the ‘SNMP ’ MIB-II’ Host template. By default, the columns above are shown, however extra columns are available by clicking on the column headers contextual menu.
From here, you can update the list of hosts with the appropriate data before importing into Opsview. You can also right-click on any row, which loads a contextual menu as below:
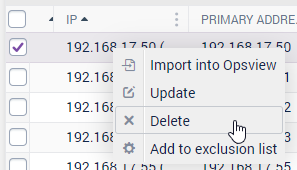
From this contextual menu, you can choose to:
- Import into Opsview
- Update
- Delete
- Add to exclusion list
Importing into Opsview Copied
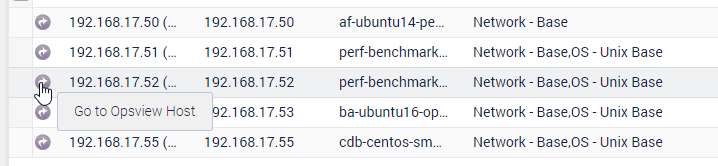
If you do not need to make any further changes, Import into Opsview allows you to convert the discovered Hosts into ‘real’ Hosts that are actively being monitored by Opsview. You can import more than one host to Opsview by checking the desired boxes next to the Hosts and clicking the Import into Opsview button. Once Hosts are imported into Opsview, they are placed at the bottom of the ‘results’ list and an arrow icon will appear. This hyperlink takes you to the Host within the ‘Configuration > Hosts’:
If you rerun the same scan, Opsview Monitor will identify hosts that you have already imported but mark them with an exclamation mark and provide a tooltip with reasons why this host should not be imported (again).
Note
This is calculated at the time the Sandbox grid is open, so changes to the Opsview configuration will affect the results.**

Updating one host Copied
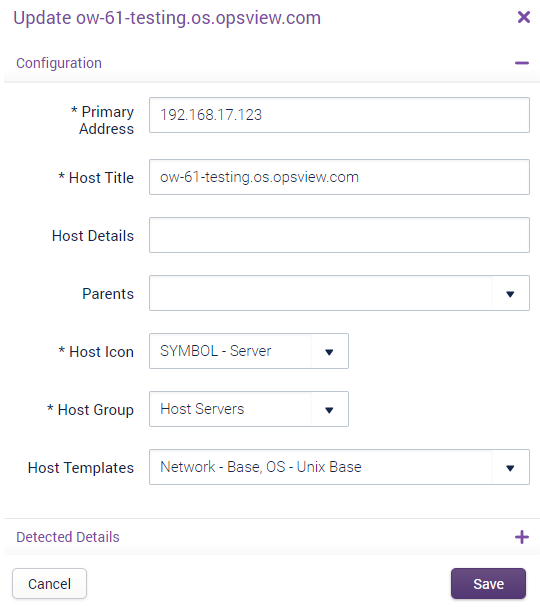
You may need to change the information presented on the screen such as the Primary address, Host Title, Assigned Template, etc. You can do this by double-clicking the cells in the grid. You will get either a free form text field or a drop-down list depending on the type of data for that cell:

Alternatively, you can select the Host that needs changes by ticking the checkbox and clicking on the Update button in the toolbar:

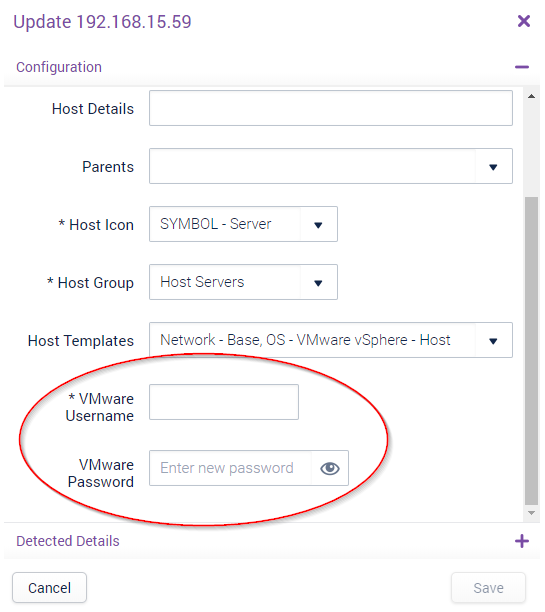
For VMware agents, extra information is required before they can be imported. The sandbox grid will show a row like:

If you click on the VMware text, you will get an Update window with extra fields for VMware:
Bulk updating hosts Copied
If you select more hosts in the sandbox grid, the toolbar buttons change to be bulk actions:
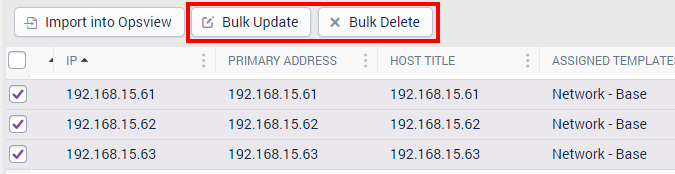
Bulk Update provides you with the ability to change a subset of fields for more than one host at a time. The options available are:
- Update Parents — adds a parent to the Hosts selected or replace the parents on the Hosts selected with a new option.
- Update Host Group — changes the Host Group that the Host belongs to.
- Update Host Icon — changes the icon that the Host will display.
- Update Host Templates — adds a Host template to the selected Hosts, or choose to replace all Host templates currently on the selected Hosts with one or more new Host templates which are multi-selectable via the drop-down menu.
Deleting a host and bulk deleting hosts Copied
Delete or Bulk Delete will delete the Hosts that have had their checkboxes checked.

On press of the Delete or Bulk Delete button, a message box will appear asking for confirmation of the delete action.