Opsview 6.8.x End of Support
With the release of Opsview 6.11.0 on February 2025, versions 6.8.x have reached their End of Support (EOS) status, according to our Support policy. This means that versions 6.8.x will no longer receive code fixes or security updates.
The documentation for version 6.8.9 and earlier versions will remain accessible for the time being, but it will no longer be updated or receive backports. We strongly recommend upgrading to the latest version of Opsview to ensure continued support and access to the latest features and security enhancements.
Adding a Hashtag
Adding a Hashtag Copied
To add and maintain Hashtags, go to Configuration > Hashtags:
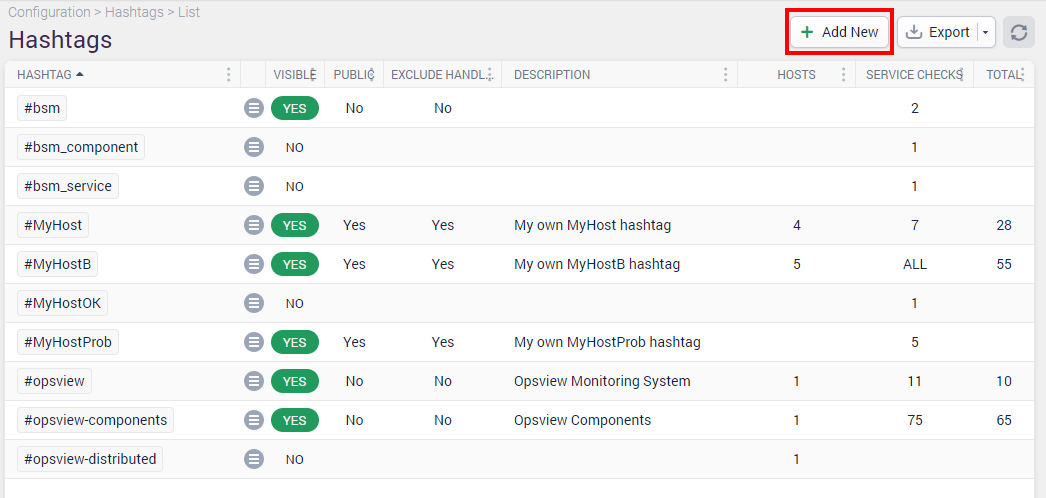
Click on the Add New button. If you tick the Enable option, the following window is displayed:
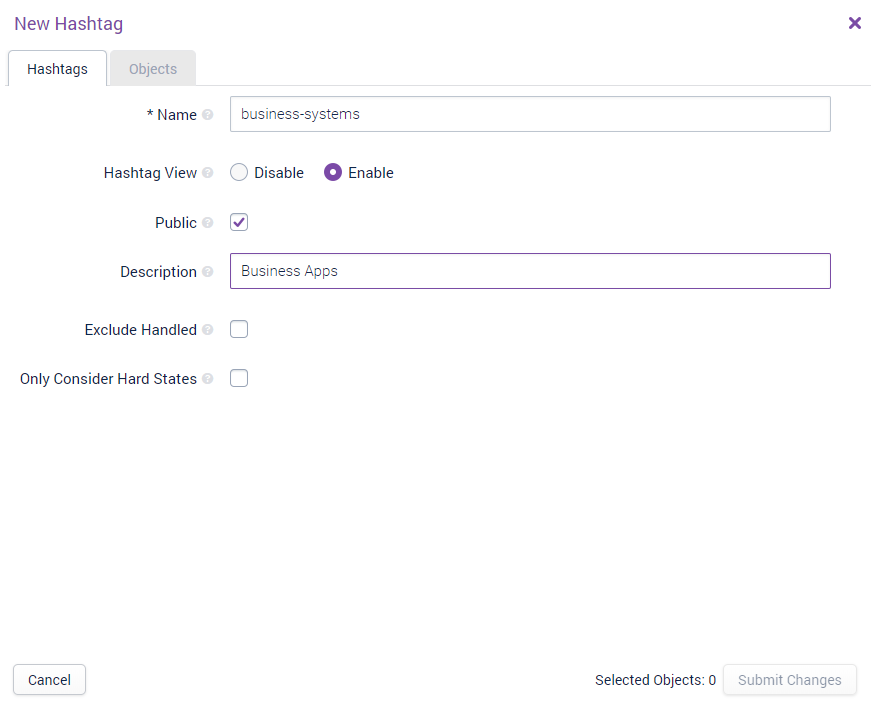
Hashtags tab Copied
Within this tab, you can set the following fields:
Name Copied
The name of the Hashtag that will be made available throughout Opsview Monitor, for example, WindowsServers.
Note
Do not include the#symbol in the name, it is only used for display within the product.
Hashtag View Copied
The options are Enable or Disable.
If set to Disabled, the Hashtag will not be visible within the Monitoring > Hashtags page; however, it will be visible still within filtering options for Event Viewer, and also within various Configuration sections including Roles, Notification Profiles, and more.
Public Copied
If checked, unauthenticated users will be able to view the Hashtag within the Monitoring > Hashtags page.
Description Copied
A friendly, descriptive name.
Exclude Handled Copied
This option tells the Hashtag to only calculate its state based on unhandled states. For example, if the Hashtag contained 4 CRITICAL Service Checks but they were all handled, then the Hashtag would display as OK or in green if this option were checked.
Only Consider Hard States Copied
By default, this option is disabled, which means the hashtag state will be from the latest state of all services.
If this is enabled, then the hashtag state will be from the HARD state of all services. This means that any SOFT state changes are ignored until the service is verified (by the max check attempts of each service) to be in the current state. As OK states are also verified with SOFT states, this means that the hashtag state may display a failure state until all services are confirmed to be in an OK HARD state.
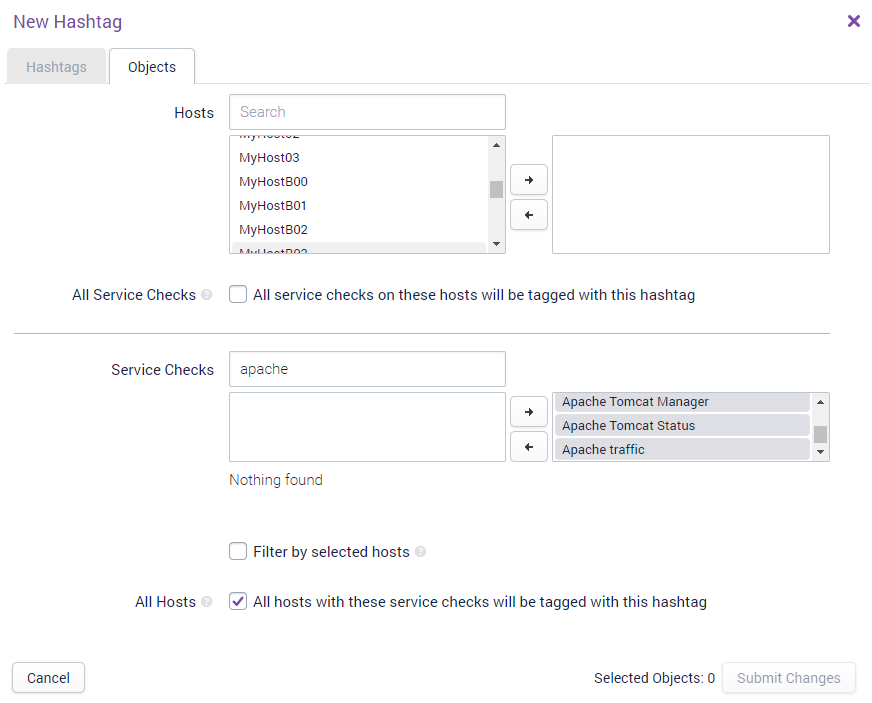
Objects tab Copied
Within this tab, you can choose the objects you want to tag with the Hashtag you are creating.
You can choose to select Hosts first and then filter the list of Service Checks to just list Service Checks that the selected Hosts have. You can also choose to select the Service Checks first and select the ‘All Hosts with these Service Checks’ box, which tells Opsview Monitor ’ ‘Any Host that has the selected Service Checks, tag with this Hashtag’.
In the example below, we are going to tag all Hosts that have Apache Service Checks with our new Hashtag. Select all Apache service checks and then tick the “All hosts with these service checks will be tagged with the hashtag’ option:
Once you have configured the objects, click Submit Changes and then go to Configuration > Apply Changes to set this into production.
This Hashtag is visible from within Configuration > Hosts, then Host Tab > Advanced drawer, in the Globally Applied Hashtags field:
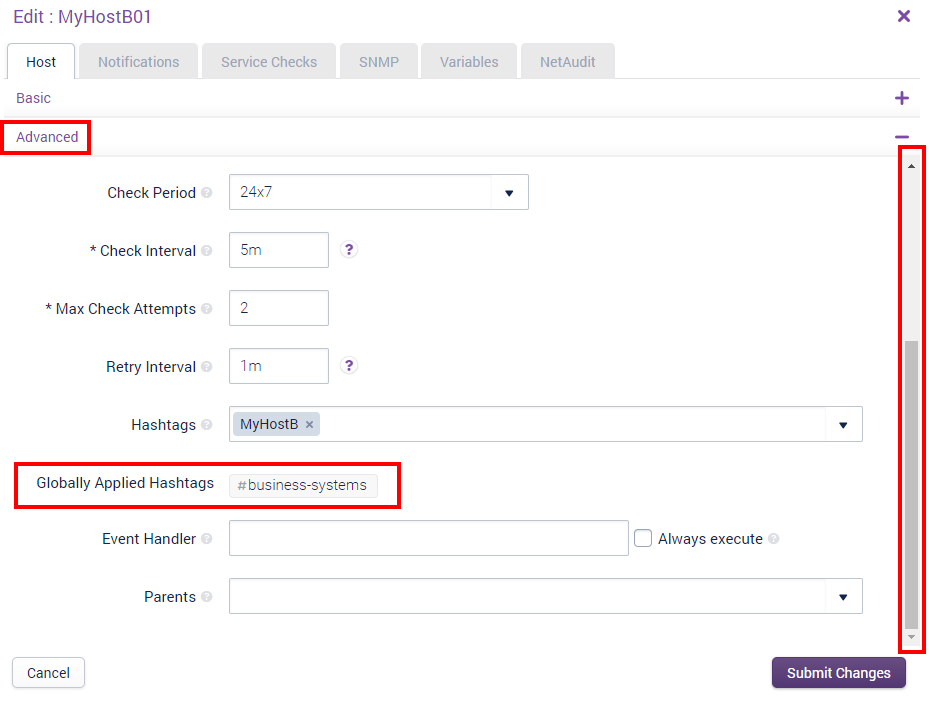
As you can see, Hashtags can also be applied on a host by host basis using the Hashtags field just above.