---
title: "Customization"
description: ""
url: "https://docs.itrsgroup.com/docs/opsview/6.11.7/administration/customization/index.html"
---
## Single sign on (SSO) authentication
Opsview Monitor can use LDAP and Active Directory for Single Sign On (SSO) functionality.
For more information about configuration, testing, and troubleshooting, see [LDAP and Active Directory](https://docs.itrsgroup.com/docs/opsview/6.11.7/configuration/users-and-roles/ldap-active-directory/index.html).
## Theme and white labelling
Changes to the theme can be applied to Opsview Monitor by updating a `custom.css` file. This file is retained across upgrades, so it will not be overwritten. However, if there are major changes to the Opsview web application, your settings may no longer work.
These are the following items that can be modified:
- Login logo
- Login button color
- Login background color
- Navigation color
- Navigation menu logo
This is an example of a customized theme:
```
/* Login logo */
.login-entry .opsview-logo {
background-image: url('../images/logo-login.png') !important;
}
/* Login button */
div.login-box button {
background: #243a72;
}
/* Login background color */
body {
background: #243a72 !important;
}
/* Navigation color */
div.Navigation, div.Navigation-subCategories, div.u-backgroundColor--brand, div.u-backgroundColor--primary-tint {
background: #243a72 !important;
}
/* Search Field Color */
.Search--input {
background: #243a72 !important;
border: 1px solid #fff !important;
}
/* Bottom Bar */
.ov-panel-purple .x-panel-header {
background: #243a72!important;
}
/* Active Navbar Item */
.Navigation-categoriesItem.is-active {
background-color: rgba(91, 107, 149, 0.4) !important;
}
/* User Dropdown */
.Dropdown-item--link {
background-color: #243a72 !important;
}
/* Active User Dropdown */
.Dropdown-item--link:hover {
background-color: #1b2b56 !important;
}
/* Navigation Menu Logo */
.Logo {
background-image: url('../images/logo-menu.png') !important;
}
```
**Note**
You will need to be the root user to make changes to files or to add new images.
Update the file at `/opt/opsview/webapp/docroot/static/stylesheets/custom.css` using the preceding CSS.
Your Login image must be placed into `/opt/opsview/webapp/docroot/static/images/` as `logo-login.png`. Use an image with a size of 256 x 120 pixels. Ensure the permissions are owner root, group opsview, and mode 644.
Your Navigation menu logo must be placed into `/opt/opsview/webapp/docroot/static/images/` as `logo-menu.png`. Use an image with a size of 56 x 80 pixels. Ensure the permissions are owner root, group opsview, and mode 644.
You can double the dimensions of your Login image and Navigation menu logo for a higher resolution to be displayed.
**Note**
These files will be overwritten on an upgrade and you will need to apply again.
### Examples
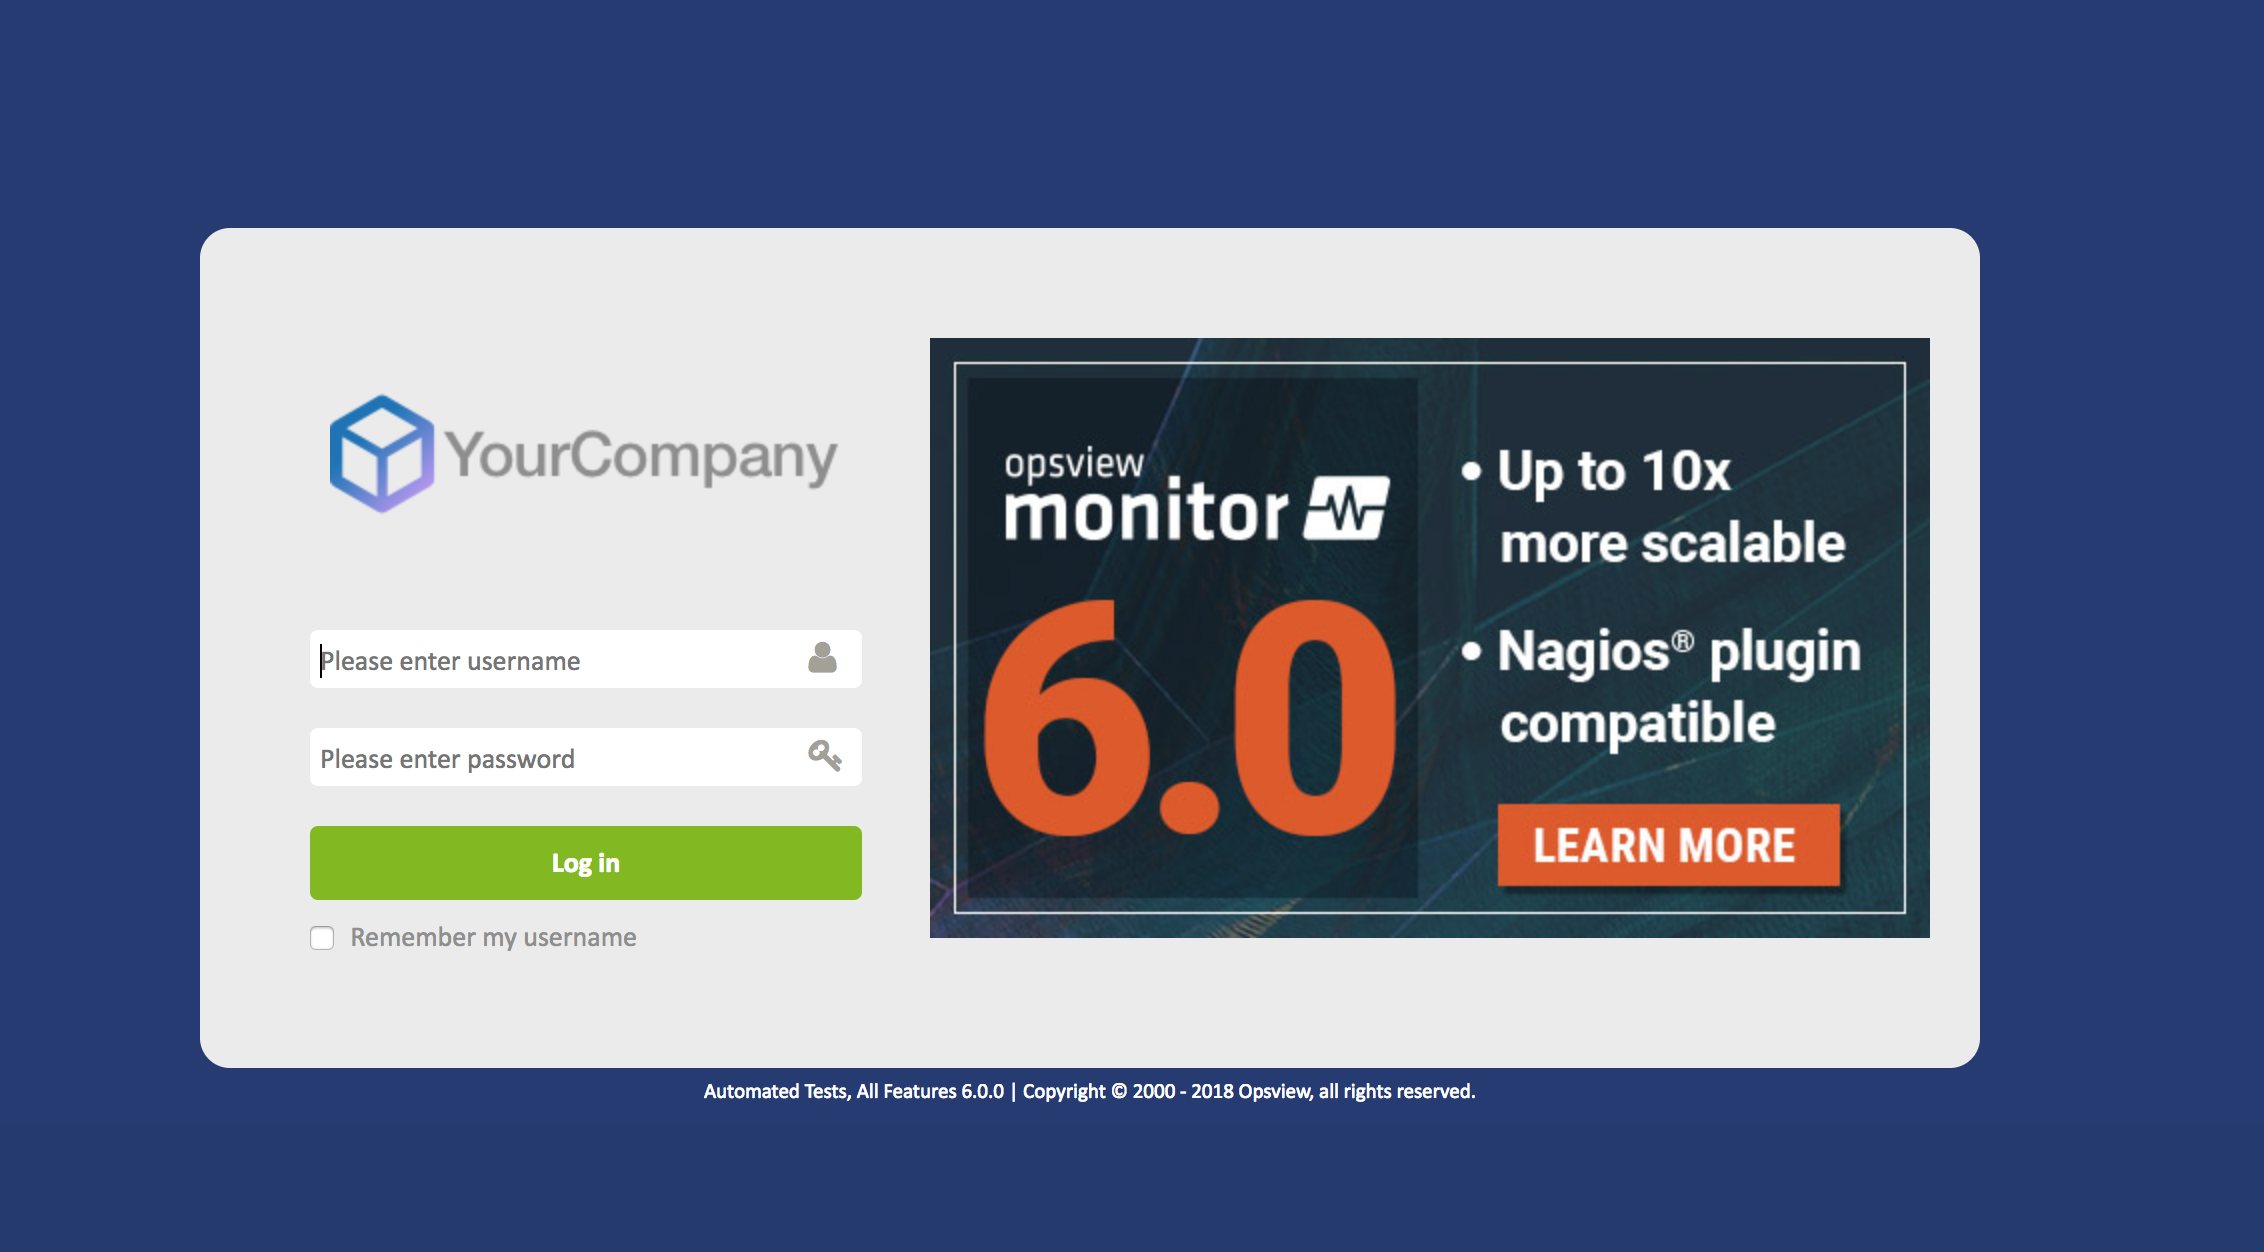
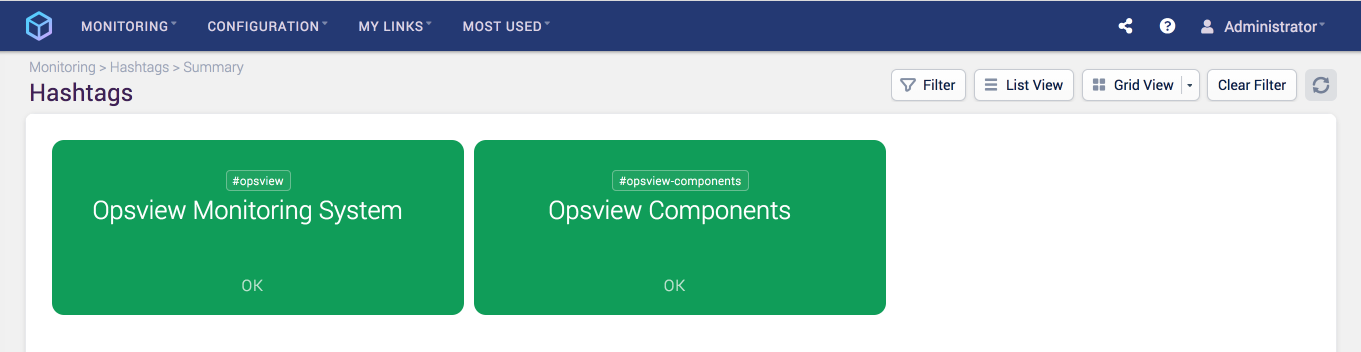
Using the modified images and the preceding CSS file, we can have a system that looks like the following:
**Login page**
**Hashtags page**
**Hosts List Page**

## Managing host icons
Opsview Monitor ships with a number of host icons that can be used to help identity device types at a glance, which are configurable on the device on the Host edit page.
You can manage your own host icons by using the `/opt/opsview/coreutils/bin/hosticon_admin` script on the command line. The host icons must be in PNG format with a size of 40 x 40 pixels. This script contains its own documentation, which can be accessed using `hosticon_admin -h`.
### Adding a host icon
To add a host icon, use the following command:
```
hosticon_admin add 'LOGO - hosticon' /path/to/hosticon.png
```
where:
- `LOGO - hosticon` is the name of the icon to be displayed within the Host edit page dropdown menu
- `/path/to/hosticon.png` is the path to the icon to be uploaded.
You might encounter the following errors:
Ensure imagemagick (dpkg) or ImageMagick (yum) is installed:
```
Cannot find necessary binary - is "imagemagick" installed? at /opt/opsview/coreutils/bin/hosticon_admin line 208.
```
Ensure the command is run as the root user:
```
source doesnt exist - has it been converted? at /opt/opsview/coreutils/bin/hosticon_admin line 211.
```
### Removing an icon
Host icons are removed from the configuration, but they are not removed from the filesystem.
Obtain the exact name of the icon by running the following:
```
hosticon_admin list
```
Then run the following:
```
hosticon_admin remove 'LOGO - hosticon'
```
## Specifying Opsview addresses
Opsview protects itself from spurious HOST headers in the http requests that it redirects to https. If users access the Opsview Web UI with a host that is not its hostname, then the valid host addresses must be configured in `user_vars.yml`.
As the root user, update the `/opt/opsview/deploy/etc/user_vars.yml` file and add or amend the following parameter:
```
opsview_webserver_external_address: "myserver.company.com"
```
or
```
opsview_webserver_external_address:
- "myserver.company.com"
- "another.address.com"
```
Then run:
```
/opt/opsview/deploy/bin/opsview-deploy /opt/opsview/deploy/lib/playbooks/orchestrator-install.yml
```
This will make the necessary adjustments to opsview-webserver configuration and restart the service.
## Re-homing
It is possible to re-home the Opsview web application on the master so that Opsview is served at a different location, rather than served at the root level. For example, instead of `https://server.example.com/`, it can be `https://server.example.com/myopsview`.
Limitations:
- Expect it to only be one level deep. For example, `/services/myopsview` is not supported.
- Opsview Reporting Module cannot be re-homed and it is served under `/jasperserver`.
- The following words cannot be used in the location: `monitoring`, `settings`, `dashboard`, `discovery`, `automonitor`, `access_denied`, `network-topology`, `bsm`, `business-services`, `collector-management`, and `dynamic-thresholds`.
As the `root` user, update the `/opt/opsview/deploy/etc/user_vars.yml` file and add or amend the following parameter:
```
opsview_webserver_base_prefix: '/myopsview'
```
Then run:
```
/opt/opsview/deploy/bin/opsview-deploy /opt/opsview/deploy/lib/playbooks/orchestrator-install.yml
```
This will make the necessary adjustments to opsview-webserver and opsview-web-app.
### Double proxying
When re-homed, you can use Opsview Monitor behind another frontend proxy. With that, when a user accesses the proxy in a browser, the sequence to access Opsview Monitor might be:
1. External request reaches `opsview-external.example.com` (your proxy server).
2. The `opsview-external.example.com` proxies to `opsview-internal.example.com` or an IP address (your Opsview webserver).
The changes required are the following:
- Set up the proxy configuration for the frontend proxy.
- Enable the **Ignore IP in Authentication cookie** feature.
- [Specify Opsview addresses](#specifying-opsview-addresses) to validate the websocket origin.
You can use the following example configurations for Apache2 or NGINX proxies, assuming the SSL is used between the proxy and the opsview server. The full installation of the proxy server is not described here since it is too specific to the infrastructure. The following configuration is required for Opsview to function through a proxy.
#### Apache 2 proxy
**Warning**
To prevent connection problems, please use an Apache HTTPD version newer than 2.4.10. Older versions might cause issues.
Place the Location configuration in your frontend proxy to forward to your Opsview Monitor server:
```
ProxyPass https://opsview-internal.example.com/myopsview retry=5
ProxyPassReverse https://opsview-internal.example.com/myopsview
ProxyPass wss://opsview-internal.example.com/myopsview/websocket retry=5
ProxyPassReverse wss://opsview-internal.example.com/myopsview/websocket
ProxyPass wss://opsview-internal.example.com/myopsview/dataserver/websocket retry=5
ProxyPassReverse wss://opsview-internal.example.com/myopsview/dataserver/websocket
ProxyPass https://opsview-internal.example.com/jasperserver retry=5
ProxyPassReverse https://opsview-internal.example.com/jasperserver
```
#### NGINX proxy
Place the Location configuration in your frontend proxy to forward to your Opsview Monitor server:
```
location /myopsview {
proxy_pass https://opsview-internal.example.com/myopsview;
proxy_set_header X-Forwarded-Host $host:$server_port;
proxy_set_header X-Forwarded-For $proxy_add_x_forwarded_for;
proxy_set_header X-Forwarded-Server $host;
proxy_http_version 1.1;
proxy_set_header Upgrade $http_upgrade;
}
location /jasperserver {
proxy_pass https://opsview-internal.example.com/jasperserver;
proxy_set_header X-Forwarded-Host $host:$server_port;
proxy_set_header X-Forwarded-For $proxy_add_x_forwarded_for;
proxy_set_header X-Forwarded-Server $host;
}
```
### Ignore IP in Authentication Cookie
By default, authentication in Opsview Monitor confirms if the IP address encoded in the request is the same as the browser IP. You need to disable this check if you have forward proxies that mask the browser IP. A symptom of this problem is that you can login to the monitoring pages, but access to Reports and Netaudit will return the login page and show the error message:
```
Authentication to Opsview succeeds, but session is invalid for X
```
To ignore the IP checking, as the root user, add the following line into `/opt/opsview/deploy/etc/user_vars.yml` on the Opsview Monitor server:
```
opsview_session_ignore_ip: True
```
Then run:
```
/opt/opsview/deploy/bin/opsview-deploy /opt/opsview/deploy/lib/playbooks/orchestrator-install.yml
```
## Web authentication timeout
By default, Opsview web sessions will expire after one hour of inactivity and the user will be automatically logged out. Sessions will be refreshed any time the web client makes a successful request to the server, for example, when the user navigates to a new page or a dashlet view refreshes.
You can configure the amount of time that a web session can be idle before it expires. This is controlled by adding the following section in `user_vars.yml`:
```
opsview_session_manager_config_overrides:
session_id_ttl: 3600 # Idle timeout for the session in seconds, default 1 hour, recommended to be no less than 5 minutes
```
Then run as root:
```
/opt/opsview/deploy/bin/opsview-deploy /opt/opsview/deploy/lib/playbooks/session-manager-install.yml
```
**Note**
Any automatic refreshes, such as in **Navigator** or in **Dashboard**, will extend the timeout.